You’re in the middle of a sewing project, and suddenly, your Brother machine starts skipping the stitches.
As worrisome as the situation sounds, it’s not a major problem, and there’s nothing wrong with the sewing machine itself.
The most likely scenario is that the sewing machine’s needle has become dull or bent due to wear and tear.
This is not a big issue and can be solved by simply replacing the current needle with the new one.
However, many beginners still hesitate to change their sewing machine’s needle by themselves – even though the procedure is the same as it is for most sewing machines.
To solve your problem, I’ve published a step-by-step guide on changing the needle on Brother sewing machines.
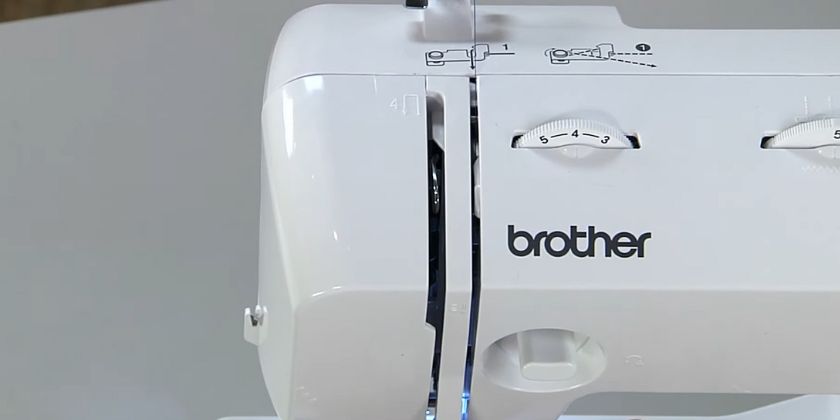
How to Change Needle on a Brother Sewing Machine?
1. Choose the Correct Needle Size and Type
Unless you’re completely new to sewing (which I highly doubt), you’ll know that not all sewing machine needles are the same.
Their size varies depending on the fabric you want to sew.
Therefore, you should pick the new needle to be the same type/size as that of the previous needle if the latter is broken/dull.
But if you’re changing it due to fabric, make sure that the new needle has the thickness/thinness required for that fabric – more on that later.
2. Turn off the Machine
Once you’ve selected the new needle, turn off the sewing machine to avoid any accidental engagement of the needle while you’re replacing it. You can also unplug the machine from the power source for extra safety.
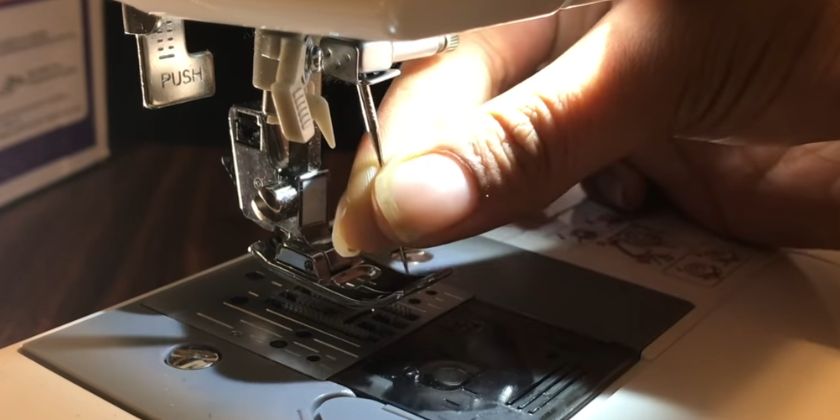
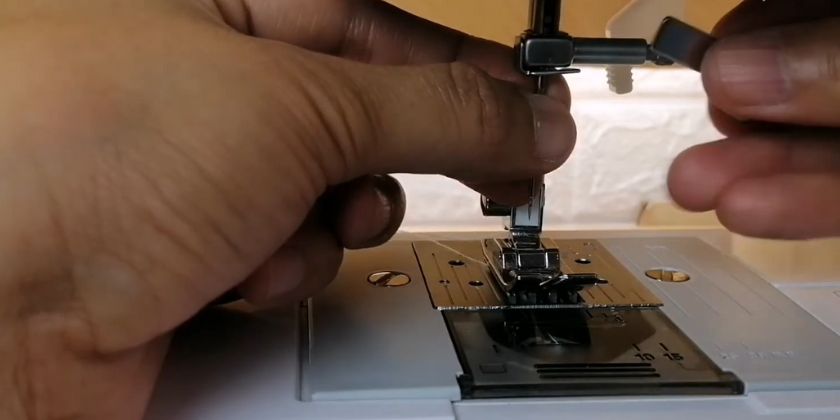
3. Remove the Needle
You’ll need to loosen the needle clamp to remove the existing needle. Many sewing machines come with a screwdriver in accessories for this task. All you need to do is to turn that screwdriver in the counterclockwise direction slightly.
After that, you can loosen it further through your fingers.
Sometimes, a needle can fall into the bobbin area when the clamp loosens. Therefore, you need to hold it with one hand while turning the clamp with the other.
If that’s not possible, you can place a cloth or a piece of paper over the bobbin area to catch that falling needle.
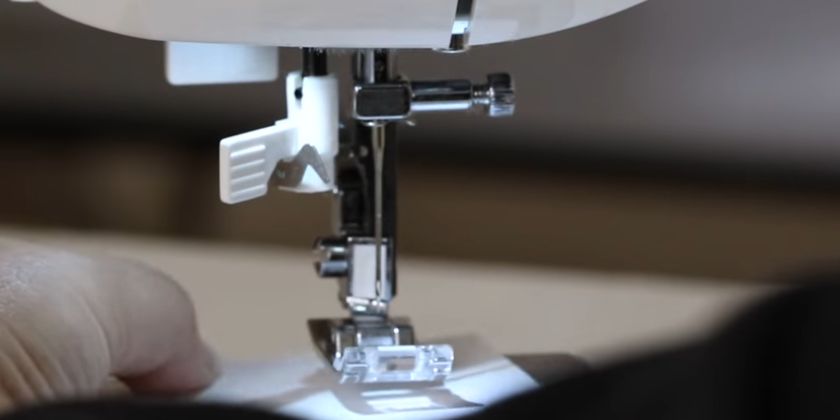
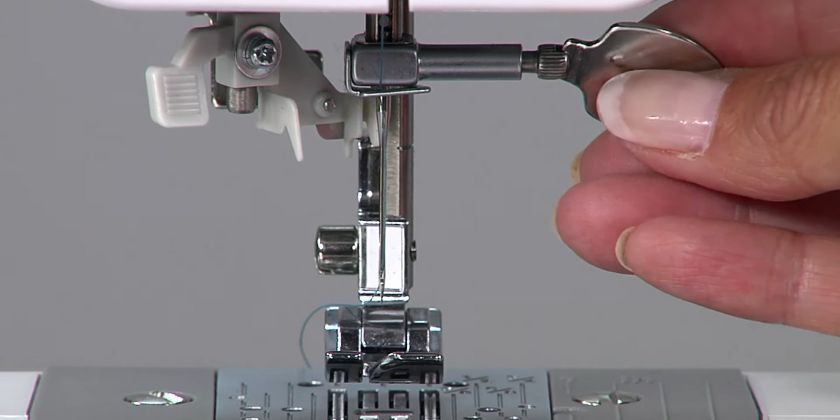
4. Place the New Needle
Now, it’s time to put the new needle in.
First, you need to lower down the presser foot to make more room for your hand. And put the new needle into the slot.
You need to ensure that the rounded side of the needle faces the front and that the needle slides up as high as possible.
Once it’s at the top, screw the needle clamp knob with the screwdriver. You shouldn’t screw it tightly as it might put extra pressure on the clamp.
On the flip side, it shouldn’t be too loose either, as the needle might fall off when you’re sewing.
5. Turn on the Machine
Once you’re assured that the new needle is securely held in place, readjust the presser foot. Plug the sewing machine back and turn it on to see if the new needle works.
How to Check If My Sewing Machine Needle is Bent?
Inspecting a sewing machine visually is one way to check whether it is bent. Pull the needle out of the machine and place it on a flat surface (with the needle’s flat side downwards). A bent needle won’t lie flat and straight as there will be a bent on its shaft.
As for the fix, you can try to straighten it with needle-nose pliers if the damage is minor. However, if it’s severely bent, the only option left is to replace it.
What is the Lifespan of a Sewing Needle?
The lifespan of a sewing needle depends on the fabric thickness. Generally, you can sew for 6-10 hours before the needle starts to wear out.
After the 10-hour mark, you should replace it even if there are no signs of damage.
What Size of Needle Do I On Brother Sewing Machine?
As mentioned earlier, the sewing machine needle size depends on the fabrics you’re sewing and the thread.
For example, if you’re sewing a heavyweight fabric like denim with a size 30 cotton thread, you’ll need a 100/16 needle. But if you’re sewing it (or tweed) with cotton thread a size 50 cotton thread, you can use 90/14-100/16 needles.
On the other hand, medium-weight fabrics, such as broadcloth and taffeta, require 75/11-90/14 for thread sizes 60-90 – it doesn’t matter if you use cotton or synthetic thread.
The same is true with thin fabrics like lawn, which require 65/9-75/11 needle size for 60-90 cotton/synthetic thread sizes.
In short, you must check your sewing machine’s manual to see the fabrics, thread size, and needle sizes it’s designed to work with.
Why Does My Needle Keep Falling Off From the Clamp?
The main reasons why your sewing machine needle keeps falling off from the clamp include:
Low-Quality Needle
Many new sewers try to save costs by using cheap, b-grade Chinese needles in their machines. These needles are made of substandard materials, making them unstable when you start sewing, and they slip out the clamp.
Incorrect Needle
The needle often falls out of the clamp because it’s not designed to work with that machine. Every sewing machine has a range of compatible needles. If you put a needle out of that range into the clamp, it’ll not hold that needle securely.
As a result, the needle will fall off every now and then. Therefore, check the owner manual to see whether the needle you’re using is compatible with your sewing machine.
Incorrect Installation
If you’ve recently installed a new sewing needle and it’s falling off, it’s possibly due to incorrect installation.
That’s because if the flat side of the needle is not facing the sewing machine’s back or it’s not pushed up high enough, the clamp grip will not be stable – and the needle will fall frequently.
Worn Needle Clamp Screw
This one is more common if your sewing machine is old.
The needle clamp screw gets worn out over time (multiple times screwing and unscrewing), which loosens the clamp’s grip on the needle. As a result, the needle becomes susceptible to falling out of it.
As for the fix, you’ll have to replace that screw with a new one.
Conclusion
Changing a needle on any sewing machine is not rocket science, but it does require some precision. Start by taking out the presser foot and removing the needle plate. Take the old needle out of the needle bar and unscrew the needle set screw with a small screwdriver. Then, take your new universal needle and insert it into the needle bar. Make sure that you have chosen the right needle size and type, depending on the fabric you will be using. Make sure to insert the flat side of the needle into the bar. Secure it with the needle set screw and slot in the presser foot.
If you have an embroidery machine, follow slightly different instructions. To change a needle on an embroidery machine, remove the bobbin case and unscrew the needle set screw located at the bottom of the needle bar. Then, take out your universal or ballpoint needles (depending on what you’re working on) and insert them into position in line with both sides of the needle plate slot. Once again, make sure that you use a compatible size and type of needles for your project – else it won’t work correctly. Finally, tighten the needle set screw and insert the bobbin case before you start sewing.